2025-04-23 23:37:58 +08:00
|
|
|
|
---
|
2025-04-24 00:03:31 +08:00
|
|
|
|
title: 登录认证
|
2025-04-23 23:37:58 +08:00
|
|
|
|
createTime: 2025/04/23 21:03:10
|
2025-04-26 11:57:13 +08:00
|
|
|
|
headerDepth: 4
|
2025-04-23 23:37:58 +08:00
|
|
|
|
permalink: /core/identity/
|
|
|
|
|
|
---
|
|
|
|
|
|
|
2025-04-26 11:57:13 +08:00
|
|
|
|
## 前言
|
2025-04-23 23:37:58 +08:00
|
|
|
|
OpenAuth.Net支持两种登录认证方式:token认证和自己搭建的OpenAuth.IdentityServer认证。
|
|
|
|
|
|
|
|
|
|
|
|
这两种方式通过配置webapi或mvc的appsettings.json可以自由切换:
|
|
|
|
|
|
|
|
|
|
|
|
```json
|
|
|
|
|
|
"IdentityServerUrl": "http://localhost:12796", //IdentityServer服务器地址。如果为空,则不启用OAuth认证
|
|
|
|
|
|
```
|
2025-04-26 11:57:13 +08:00
|
|
|
|
## token认证
|
2025-04-23 23:37:58 +08:00
|
|
|
|
|
2025-04-26 11:57:13 +08:00
|
|
|
|
当我们启动OpenAuth.WebApi/Mvc时,如果IdentityServerUrl为空,则采用普通的token认证,这时不需要启动OpenAuth.Identity项目:
|
|
|
|
|
|
```json
|
|
|
|
|
|
"IdentityServerUrl": "", //如果为空,则采用普通的token认证
|
|
|
|
|
|
```
|
|
|
|
|
|
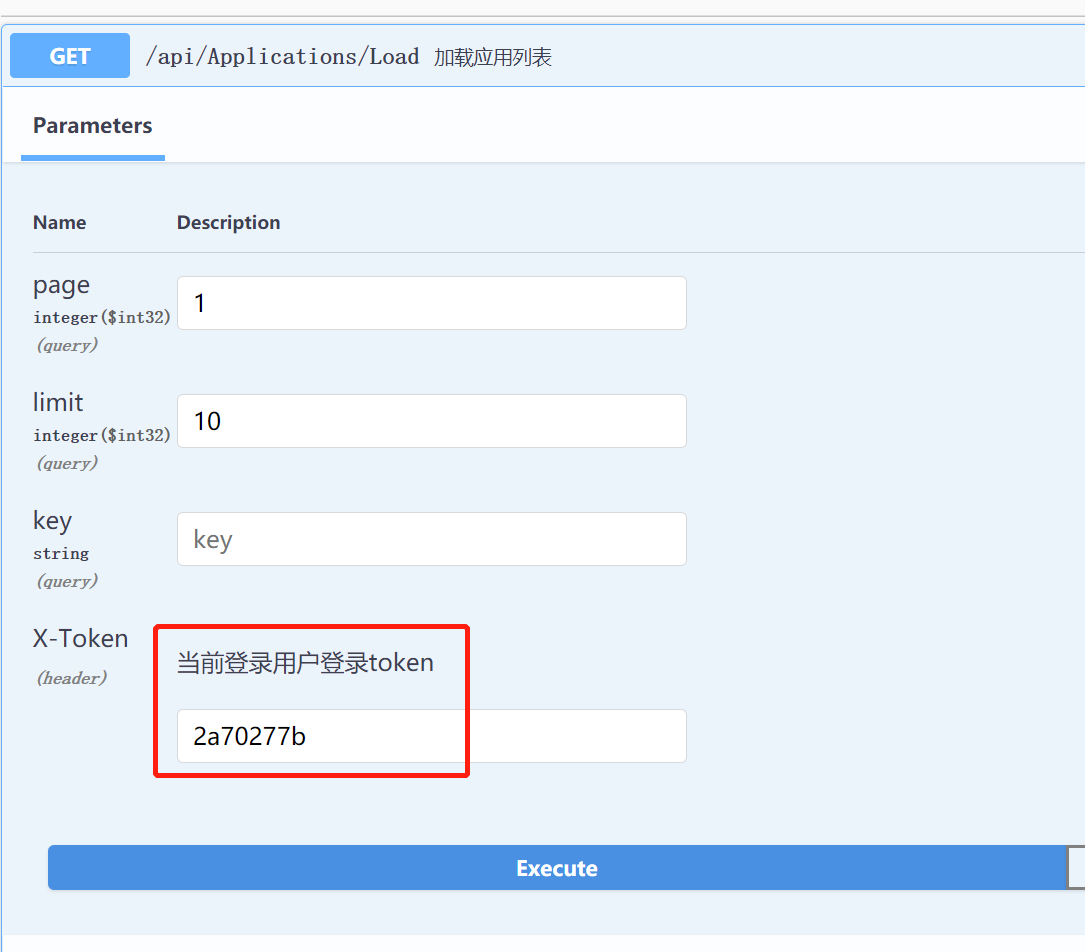
这时前端发出请求时会在请求头中添加X-Token字段,携带token值。以OpenAuth.WebApi为例,客户端在访问的接口时,先调用登录接口,得到授权token:
|
2025-04-23 23:37:58 +08:00
|
|
|
|
|
|
|
|
|
|

|
|
|
|
|
|
|
|
|
|
|
|
然后把获取到的token值添加到http header的X-Token中,即可调用对应的API接口。
|
|
|
|
|
|
|
|
|
|
|
|
|
|
|
|
|
|
|
2025-04-26 11:57:13 +08:00
|
|
|
|
## OpenAuth.IdentityServer认证
|
2025-04-23 23:37:58 +08:00
|
|
|
|
|
2025-04-26 11:57:13 +08:00
|
|
|
|
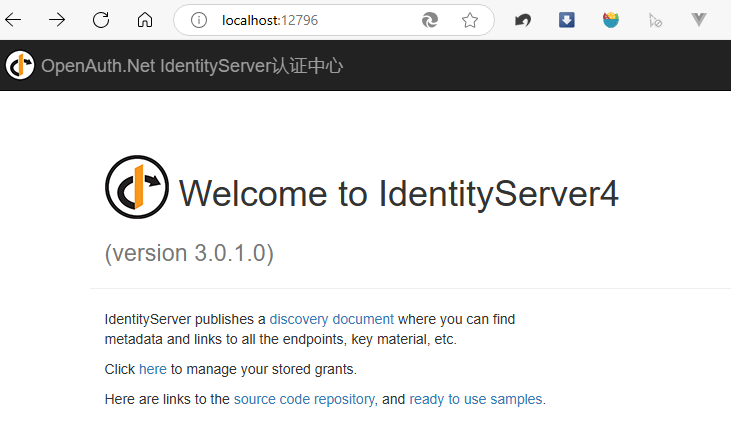
不同于其他项目的统一登录(如微信登录、支付宝登录等),OpenAuth.Net的统一登录指的是自己搭建一套OAuth登录服务,提供给其他项目使用。即OpenAuth.IdentityServer。
|
|
|
|
|
|
当我们启动OpenAuth.WebApi/Mvc时,如果IdentityServerUrl为空,则采用OAuth认证:
|
|
|
|
|
|
```json
|
|
|
|
|
|
"IdentityServerUrl": "http://localhost:12796", //IdentityServer服务器地址。
|
|
|
|
|
|
```
|
|
|
|
|
|
这种模式下,需要先启动OpenAuth.Identity项目,OpenAuth.Mvc或OpenAuth.WebApi项目才能正常运行。
|
2025-04-23 23:37:58 +08:00
|
|
|
|
|
|
|
|
|
|
|
|
|
|
|
|
|
2025-04-26 11:57:13 +08:00
|
|
|
|
### OpenAuth.Mvc接入
|
2025-04-23 23:37:58 +08:00
|
|
|
|
|
2025-04-26 11:57:13 +08:00
|
|
|
|
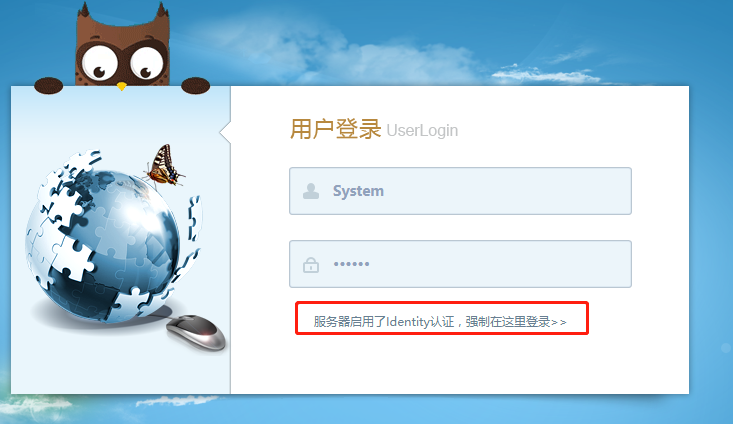
当启用了Identity时,mvc启动后界面如下:
|
2025-04-24 00:30:36 +08:00
|
|
|
|
|
2025-04-23 23:37:58 +08:00
|
|
|
|
|
|
|
|
|
|
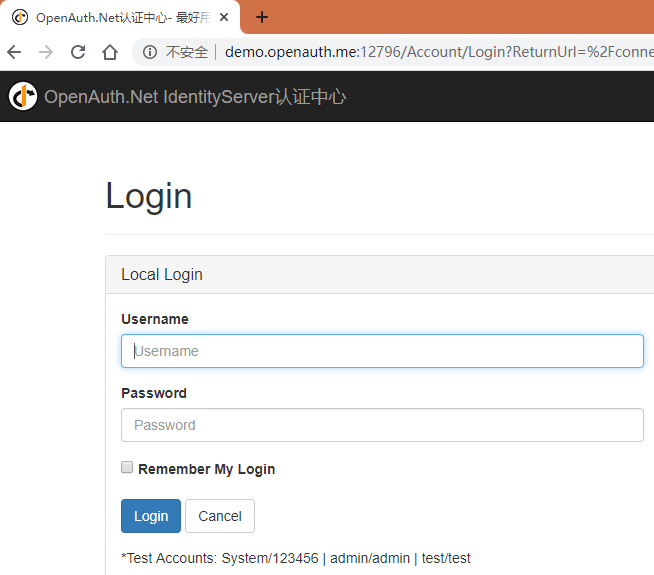
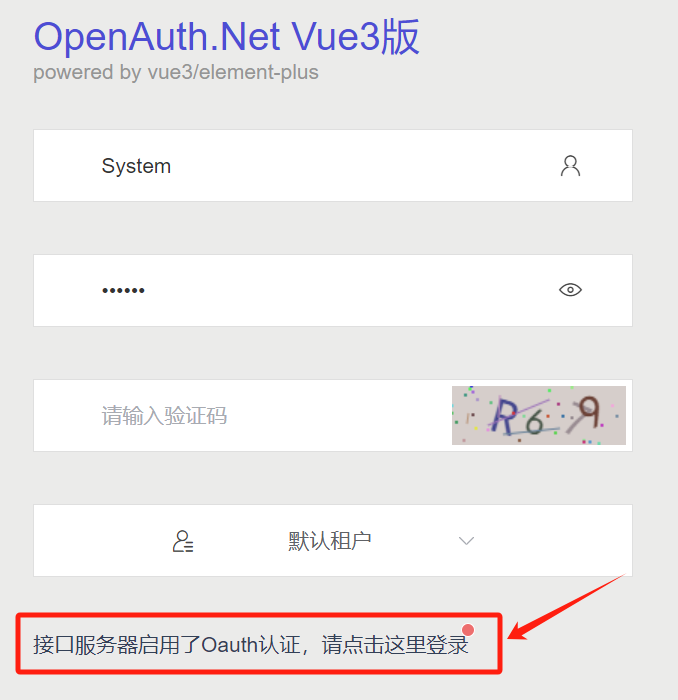
这时点击登录超链接,会跳转到OpenAuth.Identity登录界面。效果如下:
|
2025-04-24 00:30:36 +08:00
|
|
|
|
|
2025-04-23 23:37:58 +08:00
|
|
|
|
|
|
|
|
|
|
|
2025-04-26 11:57:13 +08:00
|
|
|
|
### OpenAuth.WebApi接入
|
2025-04-23 23:37:58 +08:00
|
|
|
|
|
|
|
|
|
|
当启用了Identity时,客户端调用API需要先通过OpenAuth.IdentityServer服务器的OAuth验证,才能调用接口。OpenAuth.Net调用API的客户端有两种:
|
|
|
|
|
|
|
|
|
|
|
|
#### OpenAuth.Pro vue3
|
|
|
|
|
|
|
|
|
|
|
|
在使用企业版vue界面访问OpenAuth.WebApi时,已经在文件`.env.dev`中配置好相关选项,可以直接使用,无需其他处理。
|
|
|
|
|
|
|
|
|
|
|
|
```python
|
|
|
|
|
|
VITE_OIDC_AUTHORITY = http://localhost:12796 #Identity服务器地址
|
|
|
|
|
|
VITE_OIDC_CLIENTID = OpenAuth.Pro #客户端名称
|
|
|
|
|
|
VITE_OIDC_REDIRECTURI = http://localhost:1803 #登录回调
|
|
|
|
|
|
VITE_OIDC_RESPONSETYPE = code #认证方式
|
|
|
|
|
|
VITE_OIDC_SCOPE = openid profile openauthapi #认证范围
|
|
|
|
|
|
VITE_OIDC_AUTOMATICSILENTRENEW = true #自动续期
|
|
|
|
|
|
|
|
|
|
|
|
```
|
|
|
|
|
|
如果服务端启用了Identity认证,则打开登录界面如下:
|
|
|
|
|
|
|
|
|
|
|
|
|
|
|
|
|
|
这时点击登录超链接,操作同OpenAuth.Mvc一样。
|
|
|
|
|
|
|
|
|
|
|
|
|
|
|
|
|
|
#### SwaggerUI
|
|
|
|
|
|
|
|
|
|
|
|
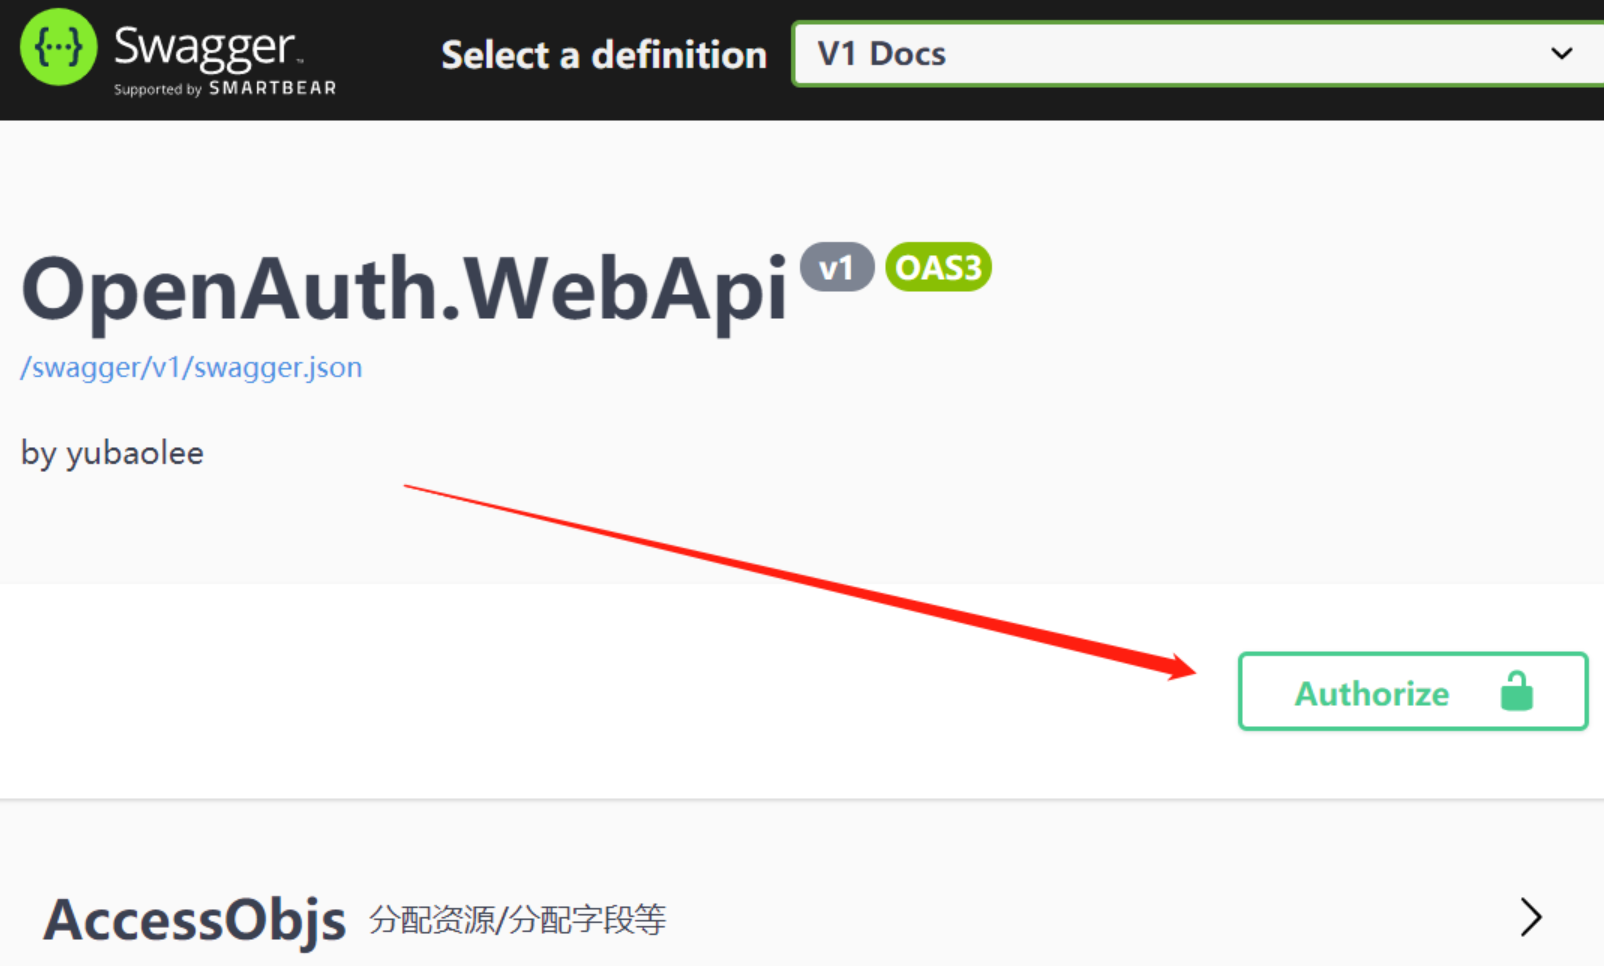
当我们启动了OpenAuth.WebApi,在浏览器打开[http://localhost:52789/swagger/index.html](http://localhost:52789/swagger/index.html)时,其实是Swagger框架给我们生成的一个调动客户端,对于启用了Identity的服务,Swagger会有一个Authorise的操作按钮:
|
|
|
|
|
|
|
|
|
|
|
|
|
|
|
|
|
|
|
|
|
|
|
|
|
|
|
|
|
|
|
|
|
|
|
|
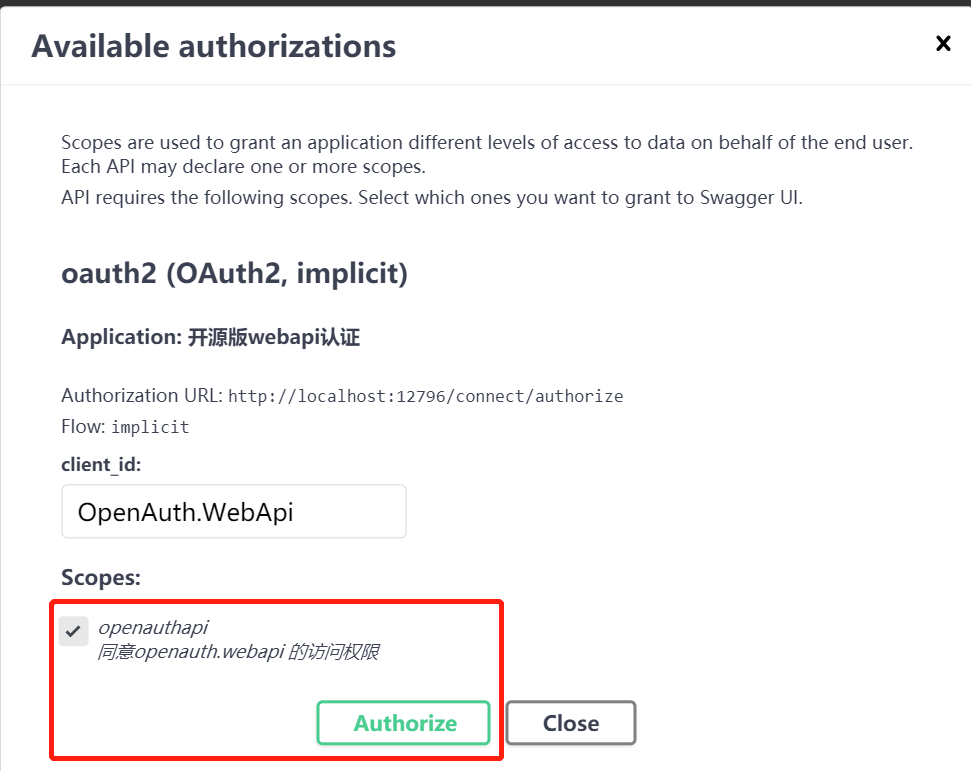
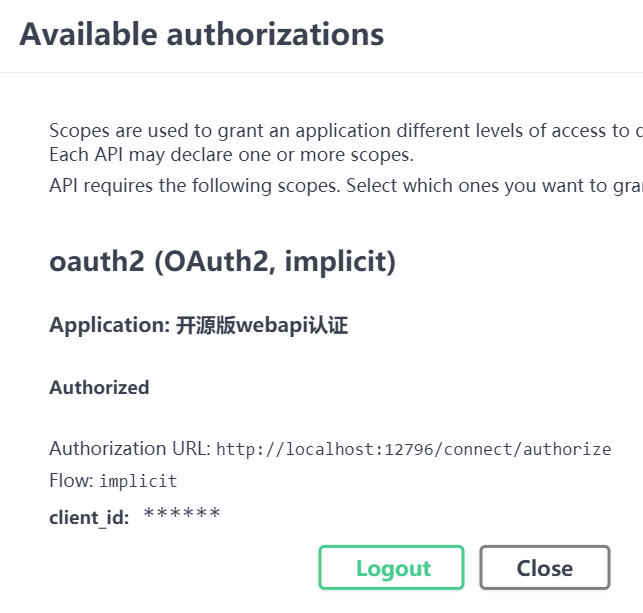
点击登录超链接,会跳转到OpenAuth.Identity登录界面。登录成功后会自动跳转回来。提示授权成功:
|
|
|
|
|
|
|
|
|
|
|
|
|
|
|
|
|
|
|
|
|
|
|
|
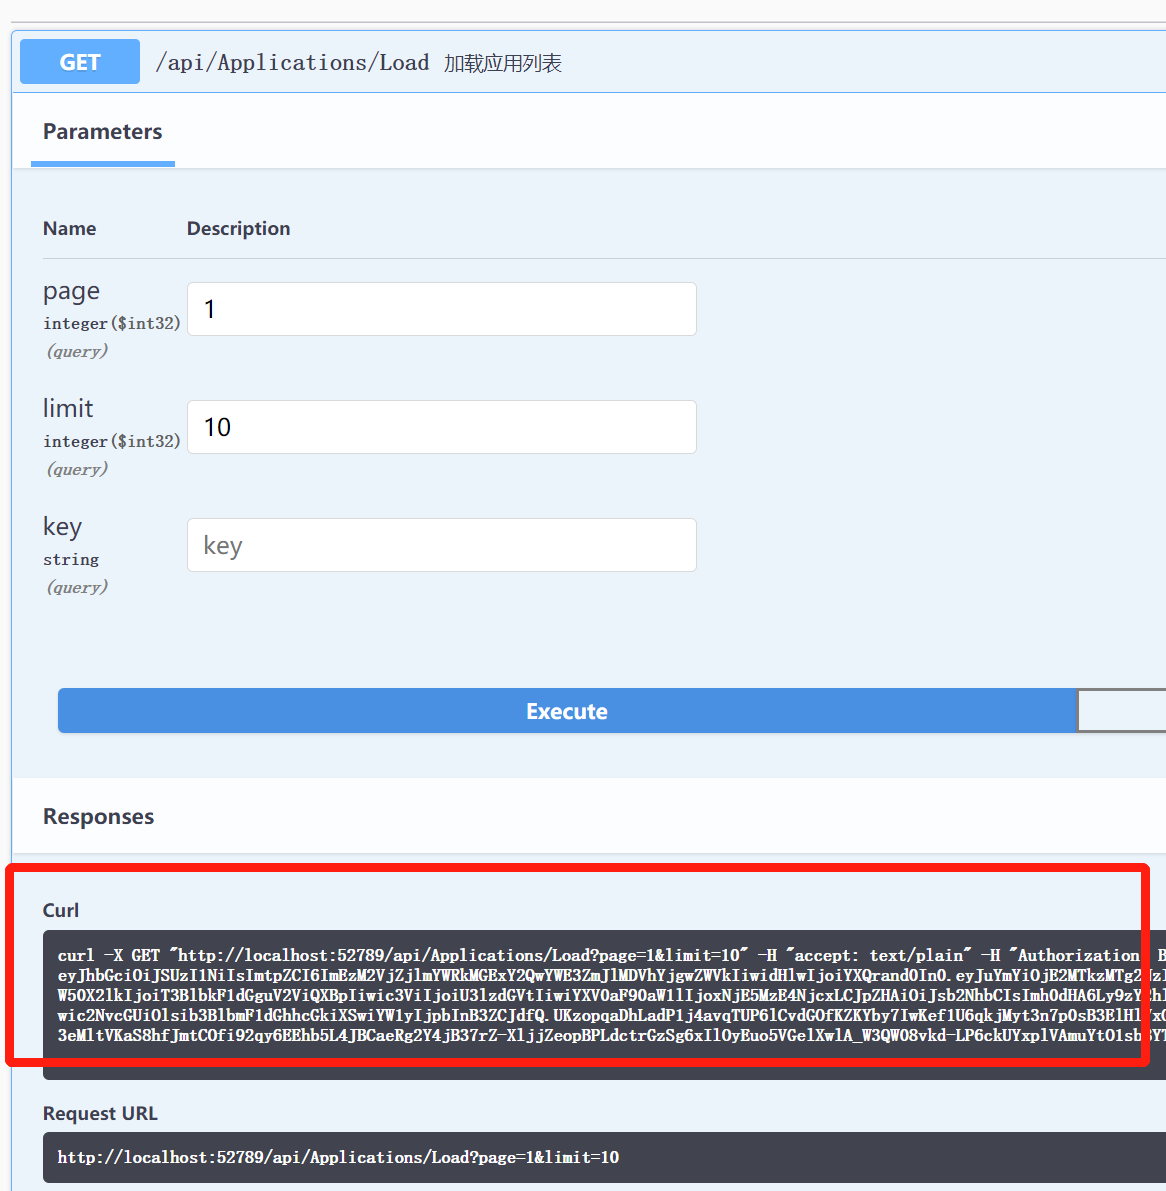
这时所有的接口都可以直接访问,访问时会在http头上自动加认证信息:
|
|
|
|
|
|
|
|
|
|
|
|
|
|
|
|
|
|
|
|
|
|
|
|
|
|
|
|
|
|
|
|
|
|
|
|
|