mirror of
https://gitee.com/dotnetchina/OpenAuth.Net.git
synced 2025-07-18 22:35:58 +08:00
31 lines
1.6 KiB
Markdown
31 lines
1.6 KiB
Markdown
---
|
||
title: 快速开始
|
||
createTime: 2025/04/23 23:43:26
|
||
permalink: /pro/start/
|
||
---
|
||
## 工具准备
|
||
#### NodeJs
|
||
前端环境为NodeJs,下载地址:[http://nodejs.cn/download/current/](http://nodejs.cn/download/current/)
|
||
#### visual studio code
|
||
下载最新版的vs code,或Cursor、Windsurf、Trae等工具用来作为OpenAuth.Net Vue3版的开发工具。
|
||
## 源码下载
|
||
根据授权文件的下载指示,下载Vue3源码。注意:一定要使用下图中的数据库脚本:
|
||

|
||
## 创建数据库
|
||
* 新建一个空数据库:OpenAuthPro。使用上一步下载的【sql脚本】文件夹,根据你的数据库类型,选择运行你需要的脚本:`Sql Server脚本.sql`或`mysql脚本.sql`
|
||
## 启动后端
|
||
启动后端请参考:[快速开始](/core/start/)
|
||
## 启动前端
|
||
使用Vs Code(或个人喜欢的工具)打开openauthvue3文件夹,修改配置文件`.env.dev`对应的后端接口地址,调整为自己的接口地址:
|
||
```javascript
|
||
VITE_BASE_API = http://localhost:52789/api
|
||
VITE_BASE_IMG_URL = http://localhost:52789
|
||
```
|
||
::: warning 注意
|
||
如果是发布打包,调整的文件为`.env.production`
|
||
:::
|
||
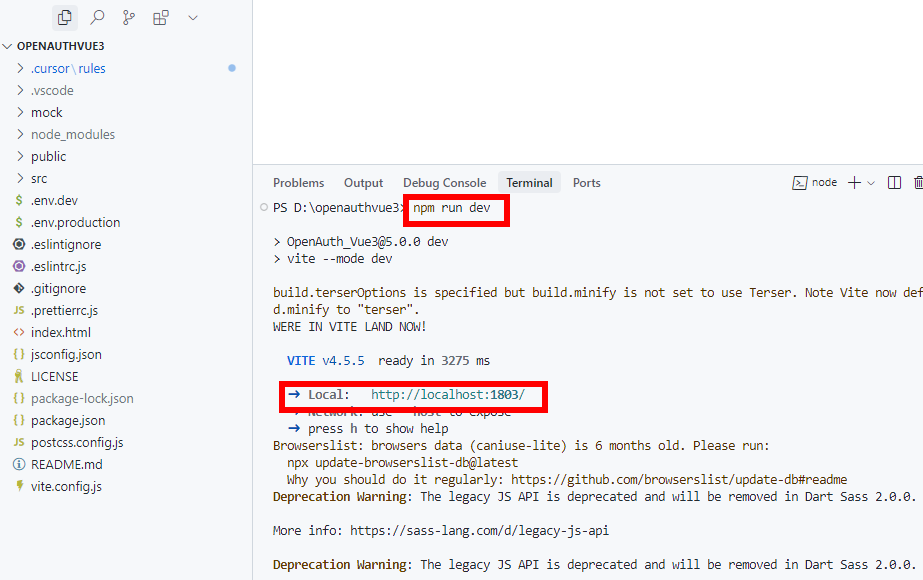
使用`npm install`命令安装程序运行所需的第三方包。再用`npm run dev`命令运行。如下图:
|
||
|
||
启动成功后,使用浏览器访问[http://localhost:1803/](http://localhost:1803/) 即可打开vue3版界面:
|
||

|