mirror of
https://gitee.com/dotnetchina/OpenAuth.Net.git
synced 2026-04-04 15:33:24 +08:00
119 lines
3.8 KiB
Markdown
119 lines
3.8 KiB
Markdown
# 企业版代码生成器
|
||
|
||
## 术语解释
|
||
|
||
#### 动态头部
|
||
|
||
如果启用动态头部,表示前端渲染列表(或表单)时,列表的列定义是从后端返回。常见的前端代码如下:
|
||
```html
|
||
<auth-table ref="mainTable" :table-fields="headerList"></auth-table>
|
||
```
|
||
```javascript
|
||
getList() {
|
||
resources.getList(this.listQuery).then((response) => {
|
||
...
|
||
this.headerList = response.columnFields
|
||
...
|
||
})
|
||
},
|
||
|
||
```
|
||
|
||
否则生成的前端列为固定的头部。如下:
|
||
|
||
```html
|
||
|
||
<auth-table ref="mainTable" :table-fields="headerList"></auth-table>
|
||
|
||
```
|
||
```javascript
|
||
initCfg() {
|
||
this.headerList = [
|
||
new ColumnDefine('id', 'id', false, false, 'text', '', 'string', 'varchar', ''),
|
||
new ColumnDefine('tableName', '表名', true, true, 'text', '', 'string', 'varchar', ''),
|
||
new ColumnDefine('moduleName', '模块名称', true, true, 'text', '', 'string', 'varchar', ''),
|
||
new ColumnDefine('parentTableId', '父表', true, true, 'selectDynamic', '/BuilderTables/AllMain', 'string', 'varchar', ''),
|
||
new ColumnDefine('foreignKey', '外键', true, true, 'text', '', 'string', 'varchar', ''),
|
||
]
|
||
|
||
```
|
||
|
||
## 准备工作
|
||
|
||
* 数据库OpenAuthPro中添加仓储表【Stock】,本文以该数据表为例。参考表结构如下:
|
||
```SQL
|
||
-- mysql示例
|
||
create table stock
|
||
(
|
||
createtime datetime not null comment '操作时间',
|
||
status int not null comment '出库/入库',
|
||
price decimal(10, 1) not null comment '产品单价',
|
||
number int not null comment '产品数量',
|
||
name text not null comment '产品名称',
|
||
orgid varchar(50) null comment '组织ID',
|
||
user varchar(50) not null comment '操作人',
|
||
viewable varchar(50) not null comment '可见范围',
|
||
id varchar(50) not null comment '数据ID'
|
||
primary key
|
||
)
|
||
|
||
```
|
||
|
||
* 使用Visual Studio 以开发模式启动后端。参考:[编译运行webapi](http://doc.openauth.net.cn/core/start.html#%E7%BC%96%E8%AF%91%E8%BF%90%E8%A1%8Cwebapi)
|
||
|
||
* 启动企业版前端。参考:[启动前端](http://doc.openauth.net.cn/pro/#%E5%90%AF%E5%8A%A8%E5%89%8D%E7%AB%AF)
|
||
|
||
后续操作全部在系统中完成。
|
||
|
||
## 单表添加
|
||
|
||
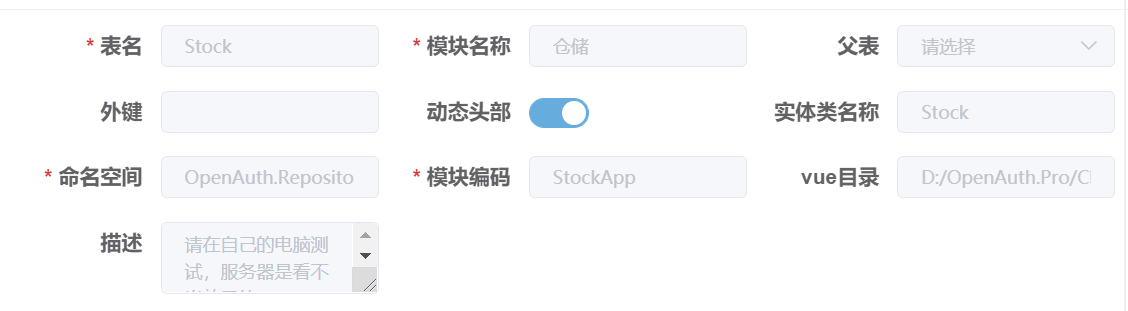
代码生成界面,点击`添加`按钮,输入想添加的模块信息。
|
||
|
||
|
||
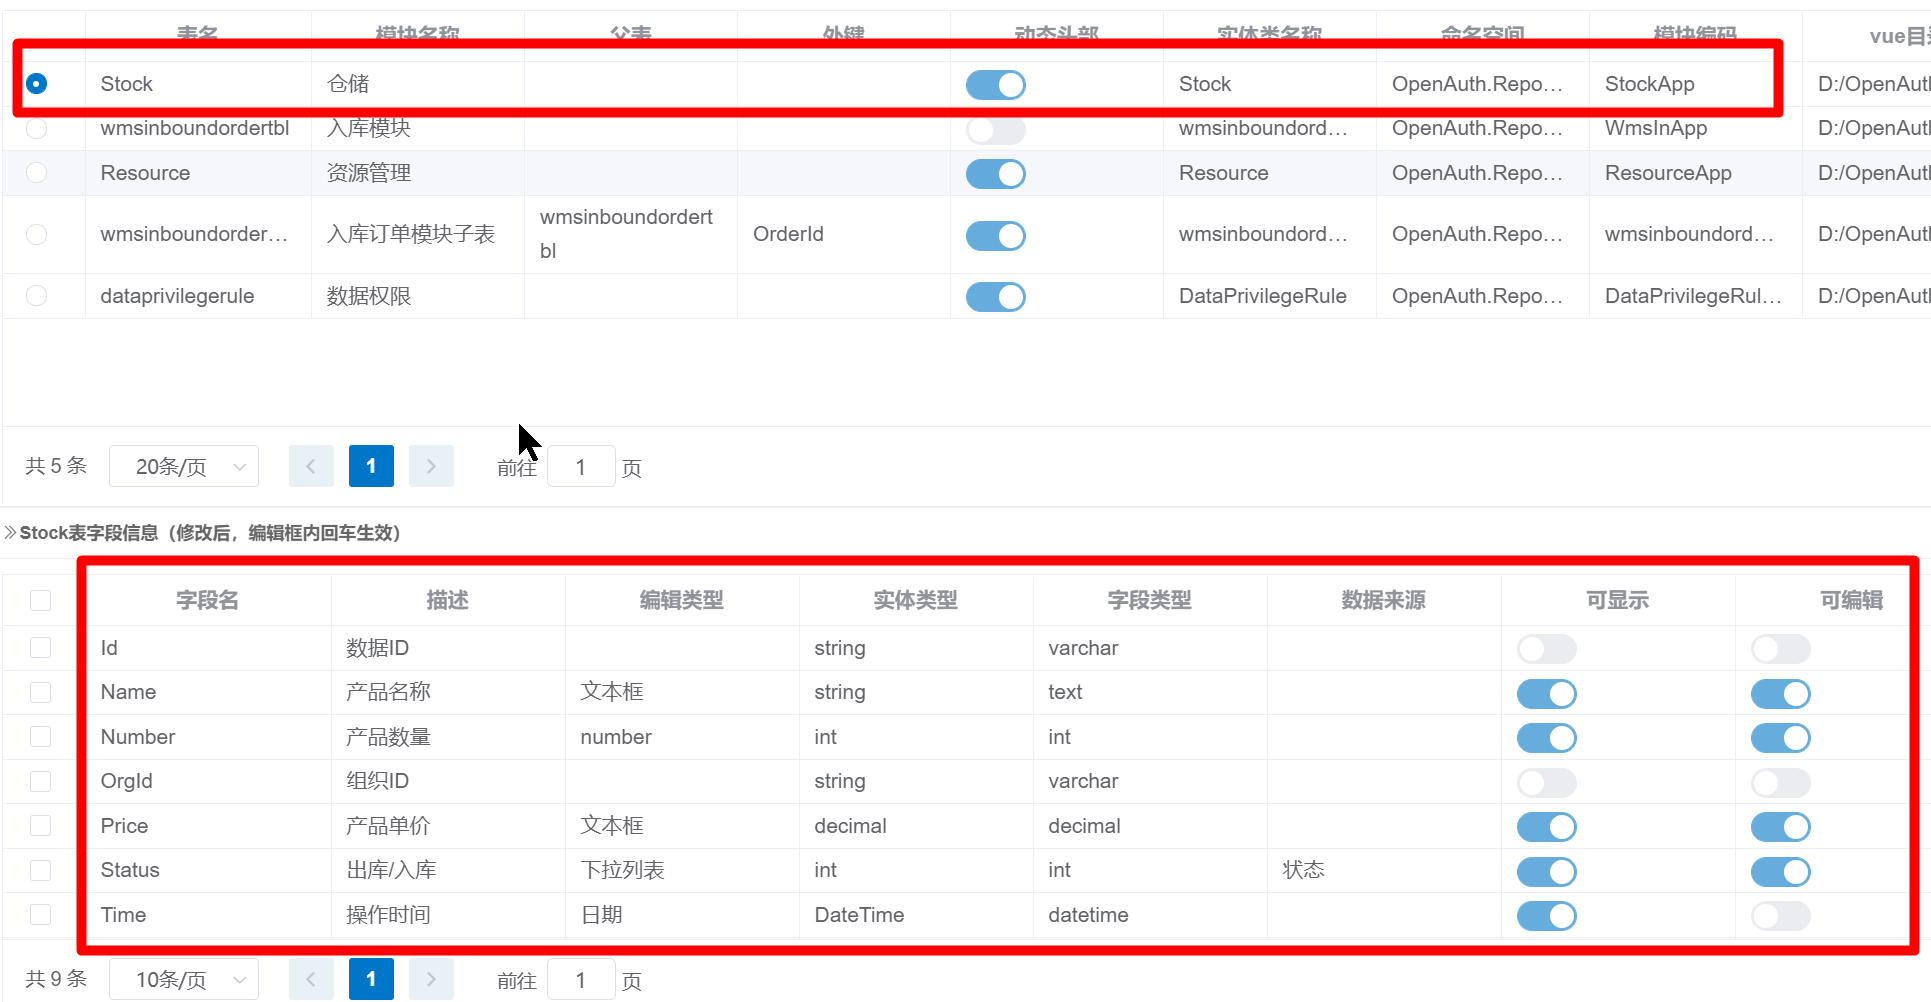
录入基础信息,点击`确认`保存后,系统会添加一条记录,并自动加载对应的字段信息。
|
||
|
||
|
||
|
||
这时,编辑字段具体的属性。如是否【可显示】【可编辑】等。
|
||
|
||
## 子表添加
|
||
|
||
::: warning 注意
|
||
如果只生成单表结构,可以跳过本节
|
||
:::
|
||
|
||
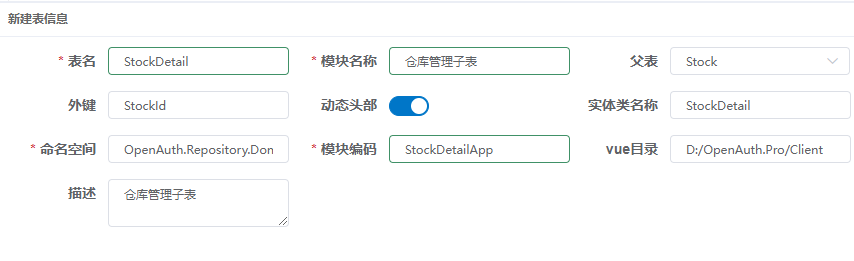
如果需要添加主/从(父/子)结构,需要先添加子表信息。代码生成界面,点击`添加`按钮,输入想添加的模块信息。
|
||
|
||
|
||
|
||
::: warning 注意
|
||
子表的`动态头部`属性务必与父表保持一致,否则会造成生成的代码不能正常运行
|
||
:::
|
||
|
||
## 生成模块
|
||
|
||
选中刚刚添加的`Stock`表,依次点击【生成实体】【生成业务代码】【生成vue页面】;
|
||
|
||
如果存在子表,也进行相同的操作。即选中刚刚添加的`StockDetail`表,依次点击【生成实体】【生成业务代码】【生成vue页面】;
|
||
|
||
## 配置模块地址
|
||
|
||
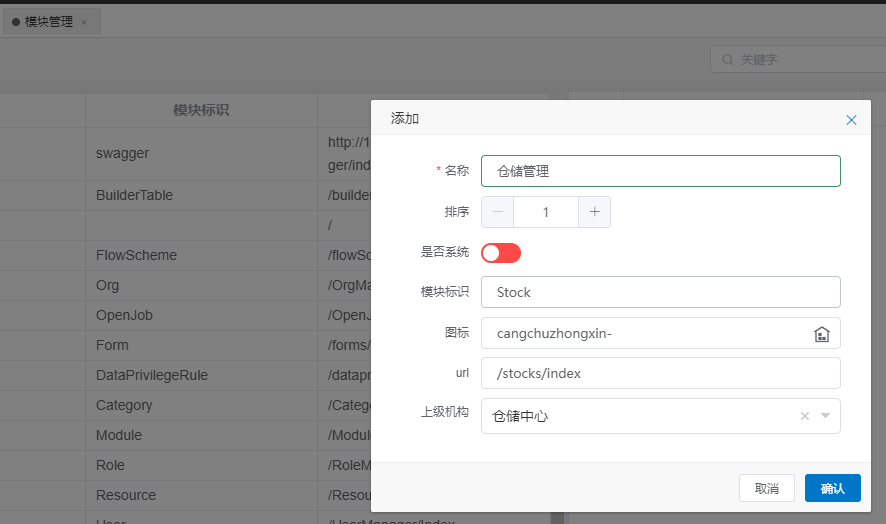
运行系统,使用System账号登录系统,在【模块管理】中,添加“仓储管理”模块,如下图:
|
||
|
||
|
||
|
||
::: warning 注意
|
||
完成以上步骤后,请重启OpenAuth.WebApi,用来重新加载刚刚生成的后台代码
|
||
|
||
子表不需要添加模块
|
||
:::
|
||
|
||
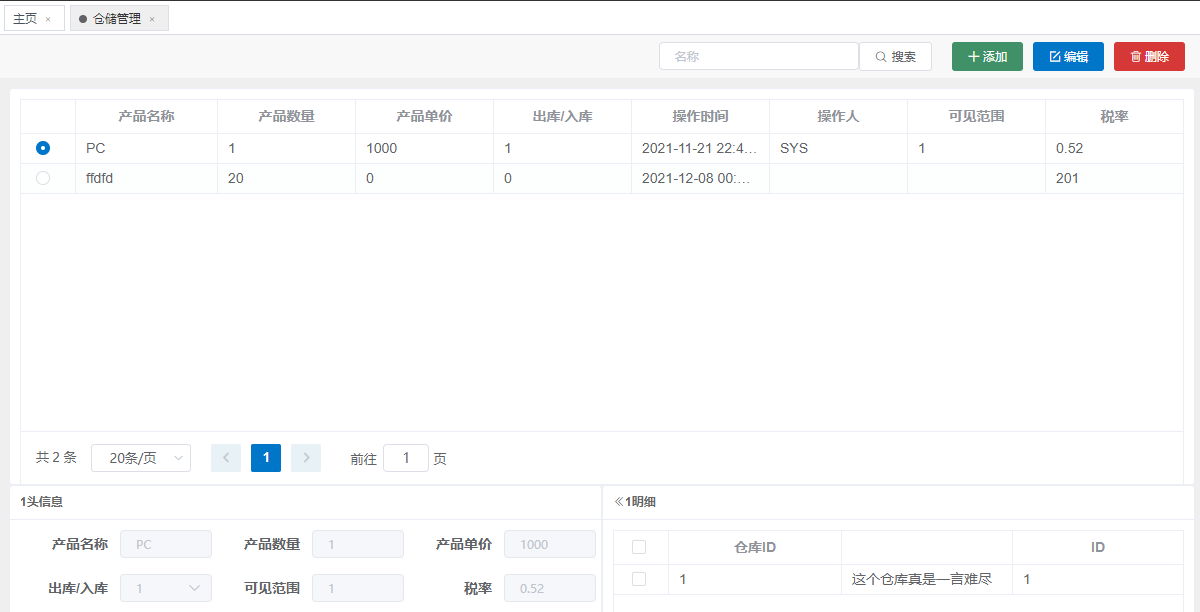
成功后可以进入新加的仓储管理界面:
|
||
|
||
|
||
|
||
|
||
|
||
|
||
|